Customizing and Using Jupyterhub on the Eagle System
A Jupyterhub instance is a means to provide Jupyter notebooks to multiple users. From the user’s perspective, it is simply a source of Jupyter server processes similar to what might run on their local workstation or laptop, but with greater access to Eagle system resources.
From an administrative perspective, Jupyterhub serves many users with their own, isolated server processes in a coordinated way. It is important to note that Jupyterhub is NOT a mechanism for multiple users to share notebooks concurrently.
Europa is the physical host running the Jupyterhub software stack, and is accessed via https from a Web browser. At login, the root filesystem is your $HOME directory. Since one cannot navigate “up” from their root directory in Jupyter, the question may arise as to how to access Eagle filesystems like /scratch or /projects. A simple workaround is simply to create a symbolic link in $HOME to wherever it is you need to go—this should point as high in the target filesystem as you will need to read or write data from. For example, if you need to access files from /projects/myproject/ and /projects/myproject/my_simulation_run1/, then symlink the former. You can use the Jupyter notebook interface and scripts to navigate down (but not up) from there.
A Python 3 default base kernel with a substantial set of scientific computing modules is available, but you will likely wish to create customized environments. Note that your Anaconda environments that you might set up when logged into eagle.hpc.nrel.gov do not carry over to Jupyterhub.
Customizing Jupyterhub
Custom Kernel and Package Setup
The following works for the Bash shell, but has been reported not to work with tcsh.
- Bring up a terminal session from within your Jupyterhub instance. You should get a prompt of the form [<user>@europa-int ~]$
- Note that logging into the Jupyterhub does not run your .bash_profile, so you may be missing custom modules collections, etc. out of the box. The examples
below don't need any, but for your own work the simple way to fix that is
[<user>@europa-int ~]$ source .bash_profile
This may make the terminal environment a little more familiar. However, your JH session is Conda-aware without modules, and you will see your existing Anaconda environment paths in $HOME/.conda-envs. Unfortunately, they are not addressable for use in JH notebooks. The base JH environment is in /opt/jupyter/anaconda3 on Europa.
The process to create some popular custom language kernels follows. shell prompt> refers to commands run in a terminal spawned from the main JH tab. <lang> prompt> implies running within a Julia or R environment started from shell prompt>. notebook cell> implies running within a Jupyter notebook after starting one up.
Python 3
- You should be sure that conda-forge is enabled as a channel option.
shell prompt> conda config --show
Look under channels parameter. If conda-forge is not listed,
shell prompt> conda config --add channels conda-forge
Setting strict channel priority via conda config --set channel_priority strict can alleviate package compatibility problems, and can speed up operations. See the Conda website for more information. - In the JH terminal,
shell prompt> conda create -n py3test python=3.7
When asked, approve the package load.
shell prompt> conda env list
shell prompt> conda activate py3test
shell prompt> conda install jupyter_contrib_nbextensions
shell prompt> conda install keras - Now we’ll install a kernel linked to this new environment
shell prompt> ipython kernel install --user --name py3test
You should see a message like
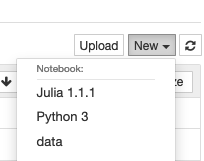
Installed kernelspec py3test in /home/cchang/.local/share/jupyter/kernels/py3test - Now go to the browser tab with your main Jupyter instance (i.e., with the file list of $HOME when you start), and refresh the tab. From there, you should see a py3test kernel present that wasn’t there before.
Start a new notebook with that kernel.
notebook cell> import keras
Although you will see deprecation warnings, you now have a Keras/Tensorflow kernel that you can use whenever you spin up a Jupyter notebook on Europa.
If you want to see the kernels you have available from a terminal,
shell prompt> jupyter kernelspec list
To change a kernel name, modify kernel.json in the folder containing the kernel. - Clean up. We’ll now free up space in $HOME by getting rid of an unused kernel (the new Keras one, for the purposes of this demo).
Shut down any open notebooks and have, and open a terminal on Europa.
First, remove the kernel specification with
shell prompt> jupyter kernelspec remove py3test
This removes the kernel so you can no longer use it in notebooks, but not the associated Conda environment. The kernel and the environment are two distinct things, and removing them can in principle be done in either order.
Once that’s done,
shell prompt> conda env remove -n py3test
Julia
shell prompt> conda create -n juliatest
shell prompt> source activate juliatest
shell prompt> conda install -c conda-forge julia
Unlike enabling the Python kernels via ipython kernel, to enable using Julia in notebooks
spin up a Julia prompt in the terminal and add the IJulia package.
shell prompt> julia
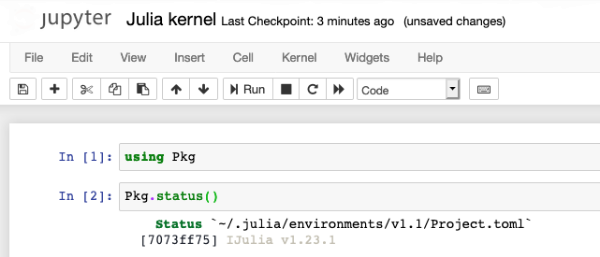
Julia prompt> using Pkg
Julia prompt> Pkg.add("IJulia")
After refreshing the main Jupyter tab, you should now see a new Julia kernel available.
- Julia manages packages outside of the Anaconda environment. Thus, ~/.julia contains information even if you remove the Jupyter kernel and the conda environment.
- If you have not run Julia on Eagle before, the Pkg.add command should run Pkg.build("IJulia") as well.
- If you have run Julia before, then $HOME/.julia will exist and the necessary action to register the Julia kernel with the Jupyter environment may not happen. If you have trouble finding the Julia kernel from Jupyter, manually run Pkg.build after Pkg.add from inside the Julia terminal session.
R
R is similar to Julia, but it’s worth knowing about the “r” conda channel, which drastically expands the set of easily installed R packages available. There are about 6500 “r-*” packages on this channel at the time of this writing.
shell prompt> conda create -n rtest
shell prompt> source activate rtest
shell prompt> conda install r
shell prompt> conda install r-irkernel
shell prompt> R
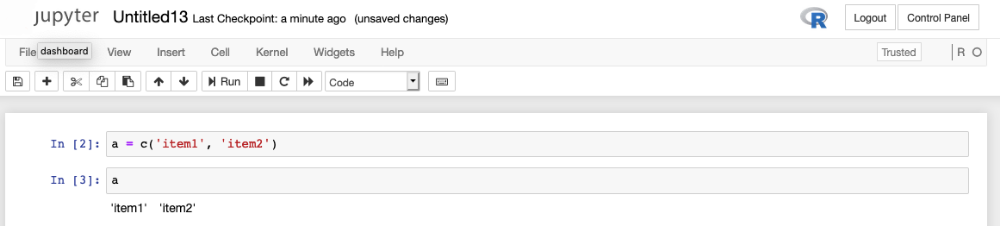
R prompt> IRkernel::installspec()
Reload main tab, and a kernel “R” should be present.
Using Jupyterhub
Slurm Interaction
You can interact with Slurm; however, the Jupyterhub environment does not have the same PATH, LD_LIBRARY_PATH, etc. set as does an Eagle login session.
If you wanted to run a compute-intensive script, you can provide the full path to srun. Here, we’re just demonstrating echo inside a notebook cell under a Python kernel.
!/nopt/slurm/current/bin/srun --nodes=1 --time=0:30 --account=<your_account> echo
'Hello World'
srun: job 5719706 queued and waiting for resources
srun: job 5719706 has been allocated resources
Hello World
Note that Python, Julia, and R have distinct ways of interacting with the shell. The "!" syntax only works for an IPython kernel.
- For Julia, the equivalent is a prepended semicolon ";".
- In R, wrap the shell command in a call to system(), with intern=TRUE set.
Compute Nodes and Running Jobs
The terminal can do so similarly to an Eagle login session. From a Jupyter notebook of course, one cannot get an interactive terminal returned. The normal Slurm commands like squeue will still work, using its full path.
Share